
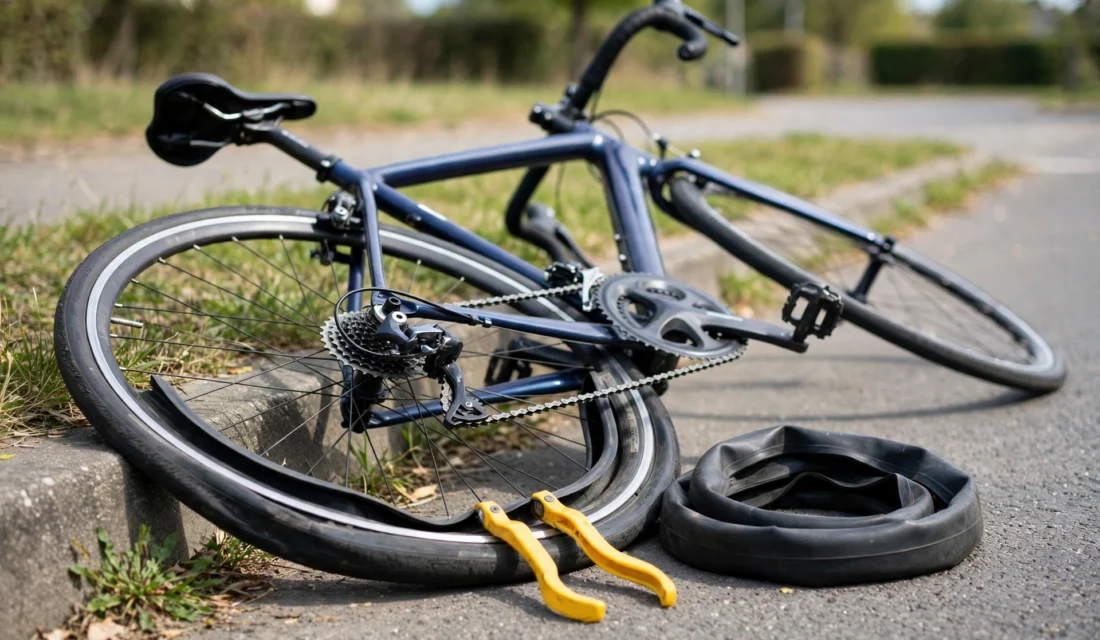
Short answer: Stop safely away from traffic and do not ride on a flat tyre. Find what caused the flat, then fit a spare inner tube, patch the tube if you have the tools and time, or plug a small tread puncture on a tubeless tyre. If the tyre is cut, the sidewall is torn, the rim is bent or cracked, or the wheel will not spin freely, do not ride it: walk the bike, call for help, or take it to a qualified repairer.
Introduction
A flat tyre can turn a calm ride into a roadside stop, but it does not have to turn into a panic. The safest fix starts before you touch a tool: move clear of traffic, stay calm, and check whether the damage is a simple puncture or something more serious.
This guide gives you that decision first, then the steps in order: stop safely, remove the wheel, find the cause, fit a spare tube or patch, inflate and check, and know when a shop is the safer choice. It also covers tubeless basics, e-bike and scooter limits, and simple prevention, so you can ride home safely or stop in time when a repair is not safe.
Which repair fits which flat?
| Repair option | When it fits | Limits |
|---|---|---|
| Spare inner tube | Sound tube-type tyre; cause removed; correct size and valve. | Quickest and most predictable. Not for cut tyres, torn sidewalls, or damaged rims. Can be pinched. |
| Patch kit | Small tube hole; no spare tube; time to clean and set it. | Slower. Poor on wet or dirty tubes. Not for torn tubes or valve damage. Check again later. |
| Tubeless plug or sealant | Small tread puncture on a tubeless tyre. | Tread only. Never for sidewall cuts or large damage. Do not ride if air keeps escaping. |
Key rule: if the tyre, rim, or wheel fails a check, do not ride. Walk, call for help, or go to a qualified repairer.
What you will need
| Item | Use |
|---|---|
| Spare inner tube | Replaces a punctured tube. Must match size and valve type. |
| Tyre levers | Lift the tyre off the rim without damage. |
| Small pump | Inflates the repaired tyre. Must fit your valve. |
| Patch kit | Backup when no spare tube is available. |
| Tubeless plug kit | Tubeless riders only, for small tread punctures. Still carry a spare tube. |
| Gloves, cloth, phone light | Protect hands, wipe the rim, and help you see. |
Note: A spare inner tube is listed as text only. No verified standalone buy link was in the draft, and no new link has been invented, so there is no Amazon card for it. Pack the kit together and check it at home.
Step 1: Stop safely and check the damage
- Move off the road before touching the wheel.
- Choose flat, firm ground, away from traffic, bends, and narrow lanes.
- Walk to a lay-by, car park, or wide verge if the first spot is unsafe.
- Check both tyres and spin each wheel slowly by hand.
Look for: thorn, nail, glass, or wire; a cut, bulge, or split; a tyre coming off the rim; or a wheel that will not spin freely.
Do not ride if you find: a torn sidewall or large cut, a bent or cracked rim, a bulging tyre, or a wheel that wobbles or will not spin. Do not inflate a visibly damaged tyre to test it.
Step 2: Remove the wheel
- Follow your bike’s own instructions.
- Release the brake if it blocks removal.
- Open the quick-release lever or loosen the axle nuts.
- Keep washers, spacers, and small parts together, in order.
- On a rear wheel, note how the chain and derailleur sit.
E-bikes: switch power off first. Do not pull motor cables or wiring, and do not open the motor, battery, or controller at the roadside. If wiring blocks removal, seek a qualified repairer.
Electric scooters: do not force a small or sealed wheel apart. Sealed wheels are not roadside repairs with basic tools. If removal is not straightforward, seek a qualified repairer.
Step 3: Remove the tyre and find the cause
- Let out any remaining air.
- Lift one side of the tyre off the rim with levers, working gradually around it.
- Remove the tube, noting where the valve sat.
- Run your fingers carefully inside the tyre and around the rim.
- Check rim tape for exposed spoke ends, damage, or slipping.
This step is the most often rushed, and the most important. A new tube fitted over a thorn still in the tyre will puncture again at once.
What the old tube can tell you:
- One small outer hole: an object came through the tyre.
- Two close holes: a pinch puncture, often from a pothole or kerb.
- Inner-side hole: rim, rim tape, or a spoke end may be the cause.
- Tear near the valve: a valve or rim-hole problem a new tube alone may not solve.

Tragoods Premium Bicycle Tire Levers Set
Stainless steel tyre levers for lifting a tyre off the rim during a tube change.
Step 4: Fit a spare tube
- Put a little air in the spare tube so it holds its shape, but stays soft.
- Fit the valve through the rim hole and tuck the tube in without twisting, folding, or pinching it.
- Push the tyre back onto the rim by hand, starting opposite the valve and finishing near it.
- Avoid levers for the final section if you can: a slipped lever often pinches a new tube.
- Push the valve in slightly and check the bead sits evenly on both sides, with no tube trapped.
Before inflating, check: the tube matches the tyre, the valve is straight, and the tread runs the right way if it is directional. If anything feels wrong, recheck before inflating.
Step 5: Inflate, check, and refit
- Inflate slowly, in stages.
- At each stage, check the bead line on both sides and watch for bulges.
- Listen for hissing. Stop at once for a bulge, a loud pop, or uneven lifting.
- Inflate to a firm pressure that suits your tyre, using the tyre sidewall and bike manual as the guide.
Do not guess one pressure for all bikes. Pressure depends on tyre, load, and conditions. Under-inflation makes pinch punctures more likely; over-inflation can stress a damaged tyre.
Refit checklist:
- Wheel seated; quick-release closed or axle nuts tight.
- Brake reconnected or reset.
- Wheel spins freely, without rubbing or wobbling.
- Both brakes engage firmly and release cleanly.
- Tyre holds air, sits evenly, and shows no bulge.
Ride slowly at first on a safe, flat stretch. If anything feels wrong, stop and recheck.

Mini Bike Pump – Portable Aluminum Alloy
A portable aluminium alloy mini pump for inflating a repaired tyre at the roadside.
If you patch instead of replacing the tube
- Find the hole: inflate slightly and listen or feel for air, or watch for bubbles if water is available. Mark it.
- Roughen and clean the area exactly as the kit instructions describe.
- Apply the patch firmly and evenly, and let it set before inflating.
- Check for other holes and check the tyre again for the cause.
Do not rely on a patch if the tube is torn, the hole is at or near the valve, the patch will not bond, or the tyre itself is cut or worn. Treat a roadside patch as a way to get home safely, and have it checked again soon. A patch repairs a tube, not a tyre.

Cyctravel Bike Tire Repair Kit
A bicycle inner-tube puncture patch kit for patching a tube at the roadside.
Tubeless tyres: the basics
On a tubeless setup there is no tube to replace or patch. The tyre and sealant hold the air.
- A very small puncture may seal itself as sealant reaches the hole. Rotate the wheel so sealant covers it.
- A plug kit can fill a small hole in the tread from the outside, following the kit instructions.
- After a repair, inflate slowly, watch for leaks at the plug and bead, and ride slowly at first.
- Check whether your tyre is tubeless or tube-type before you start.
Tubeless limits: plugs are for the tread only, never for a sidewall cut or large gash. Sealant can dry out and cannot repair structural damage. Do not ride if air keeps escaping, sealant leaks heavily, or the bead will not seat. Carry a spare tube as fallback.

PRO BIKE TOOL Tubeless Tyre Repair Kit
A tubeless tyre repair kit with plugs for small tread punctures on tubeless tyres.
When to go to a shop instead
- Sidewall cut, large gash, bulge, or worn-through tyre.
- Bent or cracked rim, broken spoke, or wheel badly out of true.
- Damaged valve or rim tape, or a flat that keeps happening in the same place.
- A new tube goes flat at once, or the tyre will not seat evenly.
- Hydraulic brakes, hub motors, or scooter wheels need tools, parts, or wiring work.
- You feel rushed, unsafe, or unsure about any step.
Going to a shop is not a failure. Keep the damaged parts, note what you saw, and tell the repairer what happened. A repeated flat is a clue, not bad luck.
Prevention for your next ride
- Check pressure regularly, using the tyre sidewall and bike manual.
- Inspect tread and sidewalls for cuts, embedded objects, cracks, bulges, and wear.
- Replace a tyre that is cracked, bulging, worn through, or showing its casing.
- Keep tube, levers, pump, and patch kit together, and check they still work.
- Avoid broken glass, thorns, and sharp gravel where you can.
- After wet or gritty rides, wipe tyres and remove small stones from the tread.
- Practise the basic steps at home once, before you need them at the roadside.
For more practical repair guides, see the Parts, Maintenance and Fixing Hub, and browse the Wheels category for related wheel and tyre articles.
Frequently asked questions
Can I ride slowly on a flat tyre to get home?
No. Even a short ride can make the tyre come off the rim, damage tyre, tube, and rim, and make control harder. Walk, repair it properly, or get help.
Why did my new tube go flat straight away?
Usually the cause was still in the tyre, or the tube was pinched during fitting. Check inside again, check rim tape and rim, and refit without pinching the final section.
Is a patch permanent?
A well-applied patch can last, but treat a roadside patch as a way to get home. Check it again after the ride. A patch repairs a tube, not a damaged tyre.
What if I have no spare tube and no patch kit?
Do not ride on the flat tyre. Walk to a safe place, call for help, or use public transport where practical. Do not accept a tube that does not match your size and valve type.
Do e-bikes and scooters need different care?
Yes. Switch an e-bike off before wheel work, never force wiring or a motor wheel, and do not open sealed scooter wheels, batteries, or motors at the roadside.
How do I choose between a spare tube, a patch, and a tubeless plug?
Use a spare tube for a sound tube-type tyre with the cause removed. Use a patch for a small tube hole with no spare tube. Use a plug only for a small tread puncture on a tubeless tyre.
What should I check after a roadside repair?
Tyre seated evenly, no bulge, holds air; wheel spins freely; both brakes work firmly and release cleanly. Ride slowly at first, and recheck at home.
