
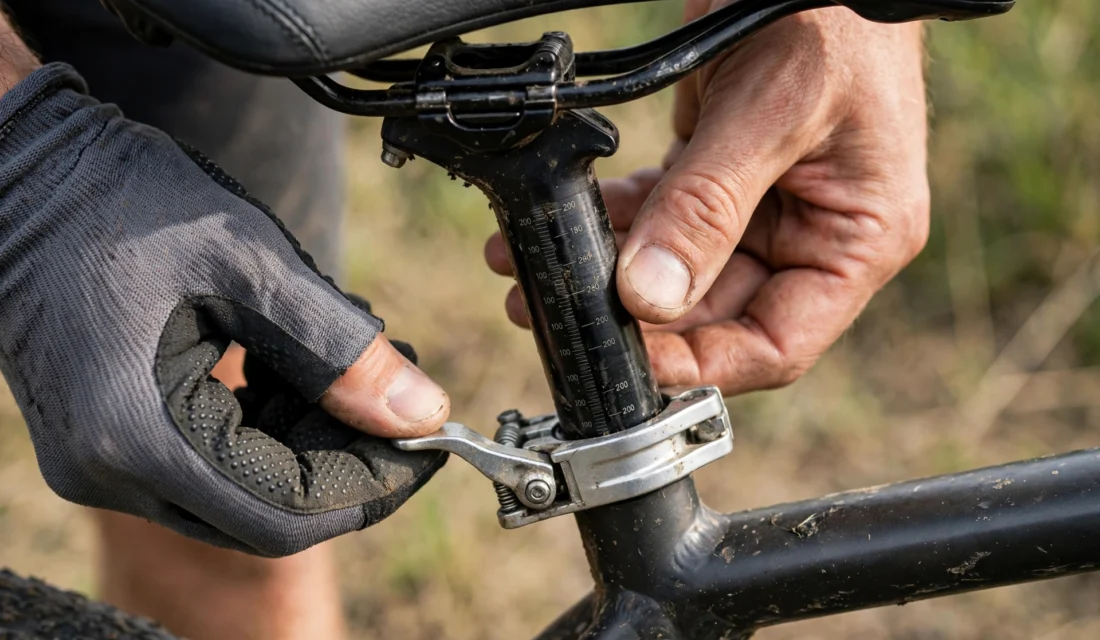
Short answer: Adjust bike saddle height so that, with your heel on the pedal at its lowest point, your leg is straight but your hips do not rock. Then set the saddle level, centre it on the rails, tighten the clamp to the maker’s torque, and fine-tune in 2 to 3 millimetre steps after a short test ride.
Introduction
A saddle that is too high or too low can turn a pleasant ride into knee pain, numbness, or a sore back. Small changes matter more here than on almost any other part of the bike.
The goal is a position that lets you pedal smoothly, reach the ground safely when you stop, and stay comfortable for the whole ride, not just the first ten minutes.
This guide walks through height, tilt, and fore-aft position in order, so you change one thing at a time and know what each change did.
What a wrong saddle position feels like
| Symptom | Likely saddle cause | First change |
|---|---|---|
| Knee pain at the front of the knee | Saddle too low, or too far forward | Raise 2 to 3 mm, or move back 2 to 3 mm |
| Knee pain at the back of the knee | Saddle too high | Lower 2 to 3 mm |
| Hips rock side to side while pedalling | Saddle too high | Lower until hips stay still |
| Numbness or pressure under the saddle | Tilt too high at the nose, or saddle shape | Level the saddle, then check saddle width and shape |
| Sliding forward all the time | Nose tilted down | Level the saddle, do not tilt it up to compensate |
What you will need
| Item | Use |
|---|---|
| Allen keys for your seat post clamp, usually 4 or 5 mm | Loosen and tighten the seat post and saddle clamp |
| Torque wrench, if you have one | Tighten carbon posts and clamps to the maker’s value |
| Spirit level or a phone level app | Check that the saddle is level |
| Tape measure and a pen | Record your starting height before you change anything |
| A helper, a wall, or a trainer | Hold the bike steady while you sit and pedal |
Safety first: Never raise the seat post above its minimum insertion mark. A post that is too high in the frame can slip, bend, or crack the frame. If you need more height than the post allows, get a longer post.
Step 1: Record your starting position
Before you loosen anything, measure from the centre of the bottom bracket to the top of the saddle, along the seat tube. Write that number down, and mark the seat post with tape at the frame, so you can always return to your starting point.
- Check that the seat post clamp and saddle clamp bolts are the type your Allen keys fit.
- Check the minimum insertion mark on the post, and make sure it stays inside the frame.
- Wear cycling shoes, or the shoes you normally ride in, because shoe height changes the fit.
Step 2: Set height with the heel method
Hold the bike upright, or put it in a trainer. Sit on the saddle, put your heel on the pedal, and pedal backwards until the pedal is at its lowest point.
- If your leg is bent at the lowest point, raise the saddle in 2 to 3 mm steps.
- If your hips rock, or you have to stretch to reach the pedal, lower the saddle in 2 to 3 mm steps.
- Stop when your leg is straight with the heel on the pedal, and your hips stay level.
- When you then put the ball of your foot on the pedal, your knee should have a slight bend, about 25 to 30 degrees.
Tighten the seat post clamp to the maker’s torque if you have a torque wrench. If not, tighten firmly by hand, then check that the post does not twist when you try to turn the saddle.
Step 3: Level the saddle and centre it on the rails
Place a spirit level along the top of the saddle, from nose to back. Most riders start best with the saddle level. A nose that points down slides you forward, and a nose that points up creates pressure.
- Loosen the saddle clamp under the saddle, adjust the tilt in tiny steps, and re-tighten.
- Centre the saddle on its rails as a starting point, with equal rail showing front and back, unless your fit needs a change in Step 4.
- Check that the saddle is straight, pointing along the top tube, not angled to one side.
For saddle shapes and comfort choices, see Top 5 Road Cycling Saddles That Will Change Your Ride Forever, which compares wide, waterproof, and endurance saddle designs.
Step 4: Set fore-aft position
Fore-aft position, how far forward or back the saddle sits, affects knee position over the pedal. Sit on the bike with the cranks level, front pedal forward, and look down at your front knee.
- As a starting check, your front knee should sit roughly above the pedal axle when the cranks are level.
- If your knee sits well ahead of the pedal, slide the saddle back 2 to 3 mm.
- If your knee sits well behind the pedal, slide it forward 2 to 3 mm.
- Re-tighten the saddle clamp fully after every move, and re-check that the saddle is level.
Do not use fore-aft position to fix a bike that is the wrong size. Large fore-aft moves change handling and weight balance, so if you need more than about 10 mm, get a professional bike fit.
Wittkop Bike Seat, Waterproof Bicycle Saddle for Comfort, Mountain and Road Biking, Wide Bike Seats

Wide, waterproof saddle with a non-slip base and ergonomic shape, for comfort on mountain and road rides.
Step 5: Test ride and fine-tune in small steps
Ride for 10 to 15 minutes on a quiet route, with varied pedalling, standing, and sitting. Notice knee comfort, hip movement, hand pressure, and whether you slide forward or back.
- Change only one adjustment at a time: height, tilt, or fore-aft.
- Change it by 2 to 3 mm only, then ride again before changing anything else.
- Record each change and how it felt, so you can return to the best setting.
- Stop and re-check the clamps if you hear creaking or feel movement.
Step 6: Check reach and stopping safety
Once the saddle feels right while pedalling, check the rest of the position. You should be able to reach the handlebars without locked elbows, and you should be able to stop safely.
- At a stop, you should be able to put one foot flat on the ground by leaning the bike slightly, or step off the saddle to the ground.
- If you cannot reach the ground at all, the saddle is too high for safe city riding, even if it feels good while pedalling.
- If your hands go numb, the saddle may be tilted too far forward, pushing weight onto your hands, or the reach may be too long.
If you use a dropper or suspension seat post, see Bike hydraulic seat post that will change your ride forever and Bicycle Seat Post Suspension – Which 5 Will Transform Your Ride? for post types that change how height is set.
When adjustment is not enough
If you have set height, tilt, and fore-aft carefully and still feel numbness, sharp pressure, or pain on every ride, the saddle itself may be the wrong width or shape for you. A saddle that is too narrow or too wide cannot be fixed by moving it.
Check the saddle for cracks, a bent rail, or a torn cover, and check that the rails are not slipping in the clamp. Replace a damaged saddle before riding, and consider a professional fit if pain persists.
Fizik Tempo Argo R5, Versatile Endurance Road Bike Saddle, Black, 160mm

Endurance road saddle with Wingflex, Type 2 foam, and a non-slip base, for longer rides.
Frequently asked questions
How high should my bike saddle be?
High enough that, with your heel on the pedal at its lowest point, your leg is straight and your hips do not rock. With the ball of your foot on the pedal, your knee should have a slight bend of about 25 to 30 degrees.
Should my saddle be level?
Yes, start level for most riders. A level saddle keeps weight balanced and stops you sliding forward. Make only tiny tilt changes after a test ride, and never use a large tilt to fix pain.
How far forward or back should my saddle be?
Start centred on the rails, then check that your front knee sits roughly above the pedal axle with the cranks level. Move in 2 to 3 mm steps only, and re-check height after a fore-aft move, because the two interact.
Why does my saddle hurt even after adjusting it?
The saddle may be the wrong width or shape, the tilt may still be off, or the bike may be the wrong size. Check for damage, re-check level and height, and get a professional fit if pain lasts more than a few rides.
Can I adjust saddle height without tools?
Some bikes have a quick-release seat post clamp, which lets you adjust height by hand. Most road and mountain bikes use an Allen key clamp, so check your clamp type before you ride, and always re-tighten fully.
How often should I re-check saddle position?
After any crash, after a seat post service, when you change shoes or pedals, and at the start of each season. Mark your best height on the post, so a slip or service does not lose your fit.
For more hands-on maintenance, visit the Parts, Maintenance and Fixing Hub and browse the saddles category. Also see Top 5 Road Cycling Saddles That Will Change Your Ride Forever and Bicycle Seat Post Suspension – Which 5 Will Transform Your Ride?.
