
Introduction
A helmet protects you only if its foam, shell, straps and buckles are in good condition. Sweat, sunscreen, rain and road dirt build up over time, and they can hide damage if you never clean and inspect the helmet.
This guide covers cleaning, daily care and replacement signs. It does not repeat fit adjustment in detail: for how a helmet should fit, see the Helmet Fit Guide linked at the end.
Cleaning methods: quick comparison
| Method | Safe for helmets? | Why |
|---|---|---|
| Hand wash, mild soap, lukewarm water | Yes | Gentle on foam and straps |
| Washing machine or dishwasher | No | Heat and tumbling can damage foam |
| Solvents, bleach, strong cleaners | No | Can weaken shell and foam |
| Air dry in shade | Yes | Prevents heat and UV damage |
What you will need
- Mild liquid soap, lukewarm water, and two soft cloths
- A soft brush or old toothbrush for vents and strap buckles
- A bowl or basin large enough for pads, if they are removable
- A towel and a shaded, ventilated place for drying
- Your helmet manual, for pad removal and care limits
Step 1: Inspect before you clean
Check the shell for cracks, dents or deep scratches, the foam for compression, cracks or missing pieces, and straps and buckles for fraying, stiffness or a buckle that will not close firmly. Check the fit system, vents and any visor or light mount for loose parts.
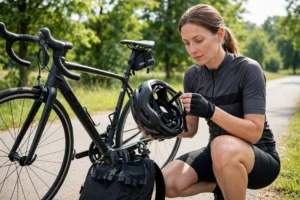
Take a photo of any damage you find, so you can compare it later or show it to a retailer. If the helmet has been in a crash, even without visible damage, treat it as needing replacement, because foam can be compressed inside without an obvious crack outside.
- Shell cracked or dented: replace, do not repair with glue.
- Foam compressed or cracked: replace.
- Strap frayed or buckle faulty: replace, unless the maker sells that part.
- Fit system broken: check for a maker replacement part first.
Step 2: Remove pads and straps safely
Remove pads only if the manual says they are removable, and note their positions with a photo. Pads often differ between front, sides and crown, and fitting them in the wrong place changes comfort and fit. Do not pull hard on glued pads or straps, and do not remove the foam liner itself.
Wash removable pads separately in lukewarm water with mild soap, rinse well, and press out water gently without wringing hard. For non-removable pads, wipe them with a damp cloth and mild soap, then wipe again with clean water to remove soap residue.

Step 3: Wash the shell, vents and straps
Wipe the outer shell with a soft cloth and mild soapy water, and use a soft brush for vents, where dirt and insects collect. Clean straps with a damp cloth, and clean buckles with a soft brush, checking that they open and close smoothly after cleaning.
Rinse by wiping with a clean, damp cloth, not by soaking the helmet under a running tap for a long time, unless the manual allows it. Avoid getting water trapped in the fit system or behind the foam, because trapped moisture can cause smell and mould. Never use abrasive pads, which can scratch the shell and visor.
| Part | Clean with |
|---|---|
| Shell | Soft cloth, mild soap, lukewarm water |
| Vents | Soft brush, soapy water |
| Straps and buckles | Damp cloth, soft brush |
| Visor | Soft cloth only, as manual says |
Step 4: Dry fully before storage
Pat the helmet dry with a towel, then air dry it in shade, in a ventilated place, with pads separate if removed. Do not use a hair dryer on high heat, a radiator, or direct sunlight for drying, because heat can distort foam and shell. Turn the helmet occasionally so air reaches all vents.

Wait until pads, straps and the inside are completely dry before refitting pads and storing the helmet. A helmet put away damp will smell, and straps can develop mould. If a smell remains after a full wash and dry, check for trapped dirt in vents or a pad that needs replacement.
- Dry in shade, not on a radiator or in a hot car.
- Keep pads separate until fully dry.
- Do not use scented sprays to mask a damp smell.
- Recheck buckles and fit system after drying.
Step 5: Store and handle with care
Store the helmet in a cool, dry place, away from direct sunlight, heat, petrol, solvents and heavy objects that could crush it. Hang it by its straps or place it on a shelf, rather than tossing it into a bag with tools, locks or sharp items. Do not hang it by its straps on a hook for long periods if that stretches the straps, and do not leave it in a hot car boot in summer.
Handle the helmet by the shell, not by pulling straps, and avoid dropping it on hard surfaces. A dropped helmet may look fine, but a hard impact can still affect foam, so inspect it after any drop and follow the manufacturer guidance on replacement after impacts.
Step 6: Decide when to replace
Replace the helmet immediately after a crash or a hard impact, even if damage is not visible. Replace it if foam is cracked, compressed or missing, the shell is cracked, straps are frayed, buckles fail, or the fit system no longer holds the helmet snugly. Also replace it when the manufacturer recommended age or service life is reached, which is often stated in the manual and varies by maker.
When you replace a helmet, cut the straps of the old one before disposal, so it cannot be reused by someone else, and recycle or dispose of it as local rules allow. Do not pass a crashed helmet to another rider, and do not buy a second-hand helmet whose history you do not know.
| Replacement check | Done |
|---|---|
| No crash or hard impact history | ☐ |
| Foam, shell, straps and buckles sound | ☐ |
| Fit system holds helmet snugly | ☐ |
| Within manufacturer age limit | ☐ |

Common mistakes to avoid
- Washing a helmet in a machine or dishwasher, which can damage foam.
- Using bleach or solvents to remove stains, which can weaken materials.
- Drying on a radiator or in direct sun, which can distort the helmet.
- Continuing to use a helmet after a crash because it looks fine.
- Storing a damp helmet in a bag, which causes smell and mould.
Related guides: Helmet Hub, Helmet category, Helmet Fit Guide: How a Bike Helmet Should Fit, Best Looking Road Cycling Helmet.
Frequently asked questions
How often should I clean my bike helmet? Wipe it after sweaty or wet rides, and wash pads and straps every few weeks in regular use, or sooner if it smells. A full inspection at each wash helps you spot damage early.
Can I wash my helmet in the washing machine? No, unless the manual specifically allows it for pads only. Machine washing, dishwashers and tumble dryers can damage foam, straps and the fit system.
How do I remove helmet smell? Wash pads with mild soap, rinse well, and dry fully in shade. If smell remains, check vents for trapped dirt and consider replacement pads from the maker.
When should I replace a helmet that has not crashed? Replace it when foam, shell, straps or buckles are damaged, when fit no longer holds, or when the manufacturer age limit is reached. Age limits vary, so check your manual.
Can a cracked helmet be repaired? No. Glue or tape does not restore foam protection. A cracked helmet should be replaced and its straps cut before disposal.
Is a second-hand helmet safe? Only if you know its full history, it has not crashed, and it passes a full inspection. In most cases, a new helmet with a known history is safer.
How can I tell if pads need replacing instead of washing? Replace pads when they stay flat after washing and drying, tear at the edges, lose their adhesive backing, or still smell after a thorough wash and full dry. Worn pads change fit, because the helmet sits lower or looser than intended, and they can also hide a fit problem that a new pad set would reveal. Check the maker for replacement pads for your exact model, and refit them in their original positions, front, sides and crown, so comfort and fit return to normal. If new pads do not restore a snug, level fit, or the fit system itself is worn, the helmet as a whole may need replacement rather than another pad change.
