The straight answer: for most trails, most of the time, a trail mountain bike is better. Its 2.2–2.6-inch tyres roll faster, climb with less effort and steer more precisely on firm dirt, roots and rock than a fat bike’s 3.8–5.0-inch tyres. A fat bike wins only when the ground itself is the problem — deep sand, snow, soft mud or a beach — where its wide tyres float at 5–8 psi instead of cutting in. If your local trails are firm for most of the year, buy the trail bike.
In this trail mountain bike vs fat mountain bike comparison, the surface decides the verdict. The same fat bike that feels slow and heavy on a dry singletrack feels planted on a snow-covered fire road, and the same trail bike that flies on hardpack can bog down in a sand pit. The tyre is doing most of the talking here.
Introduction
A trail mountain bike is the general-purpose mountain bike: moderate suspension travel, a 2.2–2.6-inch tyre, and geometry built for climbing as well as descending. It is the bike most riders picture when they think of a day on singletrack, and it is the default choice in the Mountain Bikes Hub — it handles the widest range of normal trail conditions.
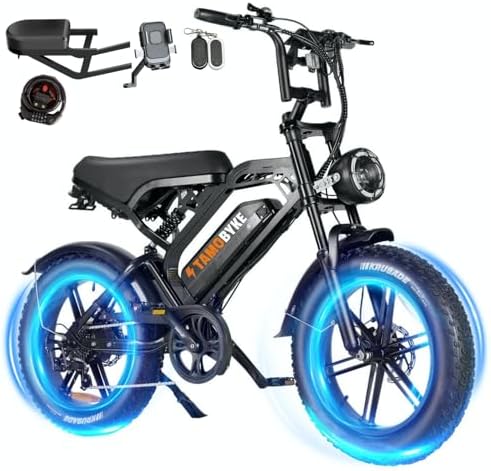
A fat mountain bike is a specialist. Its 3.8–5.0-inch tyres run on very wide rims at very low pressure, spreading the rider’s weight over a much larger contact patch. That is a huge advantage on surfaces that would swallow a normal tyre, and a real penalty everywhere else: more rotating weight, more rolling resistance and slower, heavier steering. See also Trail Mountain Bike vs Downhill Mountain Bike and Trail Mountain Bike vs Cross-Country Mountain Bike.
Trail Mountain Bike vs Fat Mountain Bike: The Core Comparison
| Attribute | Trail Mountain Bike | Fat Mountain Bike | What to Watch |
|---|---|---|---|
| Tyre width | 2.2–2.6 in | 3.8–5.0 in | Wider is better only on soft ground. |
| Tyre pressure | Typically 22–30 psi | Typically 5–10 psi on soft ground | Too much pressure removes the fat tyre’s advantage. |
| Float on soft ground | Poor — narrow tyres cut in | Excellent — the wide patch spreads the load | Test on your softest section. |
| Speed on firm trails | Fast — low rolling resistance | Slow — more rubber, more drag | Time the same loop on both bikes. |
| Climbing | Efficient — lighter wheels | Harder work — heavy wheels and drag | Long climbs expose the weight gap. |
| Cornering on firm dirt | Precise — quick steering | Heavy and vague in tight turns | Switchbacks are the fat bike’s weak point. |
| Weight | Lighter | Heavier — wide rims and big tyres | Lift both bikes; the difference is obvious. |
When the Answer Changes
The verdict flips when the surface changes. A trail bike is better on firm, dry or merely damp singletrack, on rocky climbs and on fast, flowing descents. A fat bike is better on snow, deep sand, soft mud, a beach at low tide and any trail that stays soft for weeks after rain. If your winter is long and your trails are groomed for fat bikes, the fat bike is not a compromise — it is the right tool. A heavier rider sinks a narrow tyre deeper into soft ground, so the fat bike’s float matters more — while a tight, technical singletrack widens the gap in the trail bike’s favour.
How to Decide on Your Own Trail: A Five-Step Test
Do not decide from a specification sheet. Ride both bikes on the same loop, in the conditions you actually ride in, and let the clock and your legs decide.
- Pick your real loop. Choose a 20–30 minute loop with your usual climb, your usual descent and the softest section you regularly ride.
- Set the pressures. Set the trail bike to its normal pressure and the fat bike to a low pressure suited to the surface — around 8 psi for firm trails, lower for snow or sand.
- Ride the trail bike first. Ride at your normal pace and note the time and where you felt confident.
- Ride the fat bike on the same loop. Ride the same loop, the same day, at the same effort, and compare where each bike felt easy or hard.
- Repeat on your worst surface. If you have a sandy or snowy section, ride it on both bikes. This is the section that decides the purchase.
What a Fail Looks Like
| Symptom | Likely Cause | Fix |
|---|---|---|
| The front wheel washes out in corners | Too much pressure, or a tread that cannot bite | Drop the pressure a little and check the tread |
| You bog down and stop in soft sections | The tyre is too narrow for the surface | That is the fat bike’s job — do not fight it with a trail bike |
| Your legs are spent halfway up a climb | Heavy wheels and high rolling resistance | Use the lighter trail bike, or raise the fat bike’s pressure on firm trails |
Myth vs Fact
Myth: A fat bike is just a trail bike with bigger tyres, so it is better everywhere.
Fact: The bigger tyre is a trade-off. It floats on soft ground and drags on firm ground, so it is better only where the ground is soft.
Before you test: Wear a helmet and gloves, check both bikes’ brakes and tyre pressures before you start, and test on a trail you already know. Ride the loop once at an easy pace first.
The Method: Set Up Both Bikes for a Fair Comparison
What You Will Need
- A trail mountain bike and a fat mountain bike, both in working order, with brakes and gears checked
- A pressure gauge that reads low pressures accurately — a normal gauge may not read 5 psi reliably
- A pump, a watch or timer, a notebook or phone, a helmet and gloves, and your usual trail loop
The Method
- Match the fit. Set both bikes to a comfortable saddle height and check the brakes. A bad fit ruins a fair test.
- Set pressures for the surface. Use normal trail pressure on the trail bike. On the fat bike, start at about 8 psi on firm trails and lower it only for snow or sand.
- Ride one loop each, same day. Ride both bikes on the same day and note the time for each.
- Score the soft section separately. Note how each bike handled the softest part of the loop. That score matters more than the overall time.
- Check your legs, not just the clock. Note how tired you felt after each loop. A bike that is fast but exhausting is not the right bike for a long day out.
Note: A fat bike at high pressure behaves almost like a heavy trail bike, and a trail bike at very low pressure risks pinch flats and rim damage. Test each bike at the pressure it is meant to run at.
Warning: Never ride a fat bike at very low pressure on rocky trails at speed. The soft tyre can fold, the rim can strike a rock, and a sudden loss of pressure can throw you off line. Raise the pressure before you ride rocks.
When the Damage Is Already Done
If you already bought the wrong one, do not panic — most of the damage is fixable without buying a second bike.
- Bought a fat bike but ride firm trails: Raise the pressure on firm days, fit the narrowest tyres your rims accept, and save the lowest pressures for snow and sand.
- Bought a trail bike but ride soft trails: Fit the widest tyres your frame and fork accept, drop the pressure a little, and walk the deepest sections rather than spinning and digging in.
The Safe Alternative: A Fat Mountain Bike as Your Winter Bike
If your trails are firm for most of the year, a fat bike still makes sense as a second bike for winter, keeping you riding through snow and slush. For a closer look at the fat-bike family, see Full Suspension Mountain Bike vs Fat Mountain Bike and Hardtail Mountain Bike vs Fat Mountain Bike.
- Buy for winter, not for summer. Choose the fat bike for snow, sand and soft ground, and keep the trail bike for everything else.
- Ride it on groomed trails. Many winter trail centres groom trails for fat bikes — those are the trails where a fat bike is at its best.
- Keep your trail bike. Do not sell the trail bike to fund the fat bike unless your trails are soft all year. You will want it back in spring.

What to Do Next, in Order
- Walk your local trails and note how much of your riding is on soft ground — snow, sand or mud that stays soft for weeks.
- Ride the five-step test above on both bikes, on the same loop, on the same day.
- Choose the trail bike if your trails are firm for most of the year; choose the fat bike if soft ground dominates, or add it as a winter second bike.
Never Do This
- Never buy on tyre width alone. A wide tyre does not fix a bike that does not fit you or suit your trails.
- Never run a fat bike at trail-bike pressure on snow. High pressure removes the float that makes a fat bike work.
- Never run a trail bike at very low pressure to copy a fat bike. You risk pinch flats and rim damage without gaining real float.
- Never test at full speed on an unfamiliar trail. Ride the loop gently first, then test at pace.
In Short
For most trails, most of the time, a trail mountain bike is better: its 2.2–2.6-inch tyres are faster, lighter and more precise on firm dirt, roots and rock. A fat mountain bike is better only when the ground is soft — snow, deep sand, soft mud or a beach — where its 3.8–5.0-inch tyres float at low pressure instead of cutting in. Match the bike to the ground you actually ride.
The Essentials
- Trail bike: 2.2–2.6-inch tyres, faster and lighter on firm trails.
- Fat bike: 3.8–5.0-inch tyres at 5–10 psi, built to float on soft ground.
- Trail bike wins on firm dirt, climbs and tight singletrack.
- Fat bike wins on snow, deep sand, soft mud and beach.
- Test both on your own loop and score the soft section separately.
More Questions, Answered
Can a fat bike be used as a trail bike?
Yes, but it is a poor fit for firm trails. It will climb slower, steer more heavily and tire you out faster than a trail bike on the same loop. It works best as a winter or soft-ground bike.
Are fat bikes good in snow?
Yes — snow is where fat bikes are at their best. Their wide tyres at low pressure float on snow that would swallow a normal tyre, especially on groomed winter trails.
Are fat bikes harder to pedal?
On firm ground, yes. The wide tyres and heavy wheels create more rolling resistance, so the same speed takes more effort. On soft ground, the fat bike is easier, because it floats instead of bogging down.
Additional Details
Name: Trail Mountain Bike vs Fat Mountain Bike: Which Is Better for Trails?
Description: Trail mountain bike vs fat mountain bike: which is better for trails? Compare tyre width, grip, weight and climbing, then test both on your own trail.
Published: November 10, 2026